Friday, November 30, 2012

Christmas Project: DIY Christmas Tree Cones


Greetings! I feel like the holidays have snuck up on me once again, but I don't think that's the truth. If they HAD snuck up on me, I wouldn't have all of my Christmas decorations outside before December 1st. I put a garland around the front door like... the day after Thanksgiving, but I waited a week or so to put everything else out. Okay, I didn't wait on PURPOSE, I waited because I was at a standstill.

You see, I don't know if you're aware of this, but I'm one of those post-college-very-broke girls. I live in a lovely home and have a decent car to get me around, but there's not much "Christmas decoration" money to be had, ya know? I splurged on the $12.99 pre-lit garland at Walgreens, got a pack of 100 mini colored lights there, got a pack of mini blue and silver christmas ornaments at Walmart, and a few other misc items, but mainly I had to start digging around the house for strands of leftover lights and items I could incorporate into my scene. Overall, I think it turned out pretty nice:

My favorite crafted project was the paper cones, pictured at the top of this entry. They are made from the heavy brown postal paper that comes in rolls, like wrapping paper, at the dollar store. I just laid out the paper, cut a haphazard "birthday hat" shape, and sort of elmer's glue/hot glue/wiggled it around until it was an acceptable shape, then I cut the bottom until it stood nice and flat. I then painted with shades of blue craft paint I had laying around, cut out stars from heavy disposable plates, and splurged with spray on glitter. The spray on glitter is the only item I purchased for the project, definitely the MOST expensive at almost $7 for a medium size spray can, but the effect was outstanding. To keep them standing outside, I hot glued full water bottles inside their base, one per cone. They made the cones stand a little funky, but now I know they won't blow away!

I feel like they add nice height to my flat porch, which made for good balance with the light display! I hope you enjoy this project enough to give it a try yourself, and check out my other christmas projects.


Wednesday, September 26, 2012

Scarecrow Craft


Hi all! Between my first craft show, face painting gigs, and my weekday job...as well as starting up my Etsy page that's listed right here ---> Mirmysaurus Etsy , I've been a pretty busy bee this September! I'm also going to stay pretty busy throughout October but I thought I'd show a picture of a craft I did last night that may inspire you to make one with your kids or to stay in your slim-nonexistent Fall and Halloween decor budget!

Simply take an empty 2-liter bottle, remove the label and the top (I cut the top off, then cut 4 2-inch slits throughout the top to make 4 flaps that I folded over each other to give a flatter surface. This isn't necessary for everyone but since he is sitting on our store counter in plain view I thought it would hide the bottle better. 

My scarecrow is also made to collect donations (Thus the message on the sign, and the heart cut out in his belly!) but if yours is for decorating only, put his shirt right over the front of his belly. Feel free to add the sign with a cute fall message though, that's one of my favorite parts!

Get out your paper, markers, and a little glue and your little fella (or lady) will be ready for decorating wherever you've placed them.

If you have questions, let me know! Thanks for stopping by. 

Monday, August 27, 2012

Whimsical Tissue Paper Flowers


             After taking a roadtrip for two weeks and returning home to begin immediately searching for a job (remember? My book store job closed, so sad! But life marches on) I have been swamped and unable to bring you any tutorials! I am now preparing for my very FIRST craft selling event (and it's for a great cause! Go check out the Toco Festival in Jellystone Park!) and I'm totally excited and TOTALLY scrambling to make sure my friend and I have enough items to sell. So, unfortunately I'm leaving you AGAIN without a tutorial. Instead I leave you with a fun concept and I'm sure all you crafty  whips out there can figure out where I am going with this ;) .
                  
Originally, I had a photo of the inspiration craft on here but I removed it because I did not have permission to use the photo, so to be safe I removed it. Sorry for any confusion!
  
My craft today is inspired by some browsing through Pinterest, where I found a wonderful tutorial on oversized, dreamy tissue paper flowers, and you can find the tutorial for them at Design Sponge. They are made by a company called Ruche, and they gave a great description on how to make them, but I wanted to make them for a window display and didn't want to get into chicken wire and cement (I tend to injure myself with chicken wire, and I get REAL messy with cement!). My budget was also...well, pretty much nothing. More or less, I had about $6 and whatever items I could find on hand. 

See? There's even a pile of junk sitting on the floor around my pretty flowers (and by junk I mean supplies I thought I might destroy to make more flowers!). 

To create my smaller scale version of those whimsical flowers:

For the flower stem:
Cut a piece of strong cardboard (I used a box that a shelf came in) into a slightly curved shape as "tall" as you want your flower to be. The flowers shown here are actually about 3 feet tall, and the curve just adds a bit of dimension to the shape. Then take either another piece of long cardboard or use poster board  (about 5 inches shorter than the curved piece) and bend into a "triangle" shape to add stability and dimension (You can see the straight line down the middle of the pink flower- this is the poster board). Hot glue that to the curved piece of cardboard, starting at the part that you will use as the top. 
Take a smaller piece of cardboard, about 5 inches in height by about 4-5 inches wide. Cut a slit in the bottom of the curved cardboard piece, and slide the 5x5 inside to use as a bottom stablizer (you may want to trim this to be wider at the bottom as a triangle shape to give a more natural flower stem shape). 
Take 2 toilet paper rolls as cut them in half. Then cut a piece of posterboard big enough to fit the curved board, the 5x5 board, and the now 4 pieces of toilet paper tube (one on each side of the stem). Hot glue this poster board to the bottom of everything, creating a base for the flower. Use heavy paper (I used tightly rolled newspaper) or another weighted agent and fill the toilet paper rolls. Make sure the rolls are also glued to the cardboard flower stem. 

For the Flower:
Cut a piece of poster board in an oval roughly the size of your hand (maybe a little bigger, depending on the flower size). Hot glue that to the top of the flower stem. This is now the base of your flower. Cut out large, tear drop shaped "petals" and hot glue them to the base as you desire. 
To finish it off:
Wrap the flower stem in green tissue, making sure to tuck loose tissue paper ends away if you can, then hot glue on  nice, big, loose leaves for added whimsy.


Thursday, July 26, 2012

Learning The Art of Sugar Cookies

              I've been eye-balling sugar cookies for some time. Since my first attempt at baking sugar cookies I have always burned them, miserably. I just couldn't tell when they were done, ya know? With my final weekend working at the bookstore that I have absolutely loved working at coming up, I decided I was going to suck it up and learn to make good cookies. I originally considered making a cake, but a cake is hard to split up into individual "take home" size pieces and keep it looking pretty. Cupcakes were another option, but with cookies you can make them beautiful, bag them up, and send them on their way still looking beautiful.

            Cookies became the forefront in my mind when I ran into a photo of Star Wars cookies on Pinterest. They were made by Sweet Sugar Belle. In case you're wondering, this is where I became OBSESSED with making a beautiful cookie and icing it to my heart's desire. Last year, I acquired a 100 piece cookie cutter set from Bed Bath and Beyond for $10. Awesome deal, right? I still haven't used any of them. When I decided to make these cookies, the cookie cutters where still being store at my mom's house and I'm too lazy/procrastinate-y to go pick them up. So I improvised, since I wanted a fairly simple shape.


A "TiVo" cookie cutter
 The only large cookie cutter I had on hand (I did have some small hearts and leaves for fondant but that didn't fit the bill!) was this bizarre TIVO TV cookie cutter my mom found for like 30 cents at goodwill. It had little legs like their logo, but I straightened those out for a more rectangular shape. I also used pre-mixed cookie dough but I was careful dough, but I was careful to let my egg and butter come to room temperature (Seriously, go read every article at www.sweetsugarbelle.com! She has amazing tips, techniques, hints, all that good stuff!) before mixing. I cranked the oven to 400 degrees, and put my smaller set of cookies in for 7 minutes. I smelled the burning before I saw it, whoops! I didn't think they'd burn that fast. Anyway, on my second set of cookies (my "real" cookies) I baked them for seriously, about 5 minutes and they came out beautifully. 
Whoops (7 minutes in my oven)
Royal Icing
A better baked sugar cookie (5 minutes in my oven)


After the cookies had cooled overnight, I mixed up some Royal Icing then split it into bowls for coloring. I knew I wanted the background white, black writing, and pink for the Breast Cancer Ribbon, as these are all part of our logo.
I used the Shpritz method from One Tough Cookie to make different consistencies of icing. It almost seems unfair, they made it so easy for me the first time around in making cookies I feel like I have a head start over those who have worked on them for years! Not like I'm anywhere NEAR that level yet, but now that I'm on the road... who knows ;) . 
Clean Lines
   My outline started out pretty shakey, but by the time I approached my fourth or fifth cookie (why did I move on to the burned ones AFTER the pretty ones and not visa versa? Who knows) my lines where looking mighty pretty! I let those dry about ten minutes, then took the piping icing out of the bag back into the bowl, where I thinned it down with some spray bottle water and turned it into a "flood" icing (I'm telling you, read everything Sweet Sugar Belle has written. Then you can join my lingo for this post!) . I went to the cookies and began "flooding" their middles with the icing. It wasn't as runny as I had hoped, but I used a warm spatula (Think "Smoothing out Buttercream Frosting" method here) to fill them in more consistently.
I was a little low on the white (whoops, didn't think THAT through) so mine were not as "filled" as I had hoped, but it was enough to give a nice white background. I let those dry for about 15 minutes (I should have given MORE TIME, my black icing bled onto my cookies and I'm suspecting that is why!) and wrote "Sue's News" on the cookies. 

Finally, I added the Breast Cancer Awareness ribbon to each cookie, and it became the WHOLE design for one cookie because I forgot to write the store name on there, whoops! It was a happy accident, though. 
There's alot of words here, I hope it doesn't take away from the fun of decorating cookies! Get out there and give it a shot! I'm sure mine will only improve from here, and I hope yours do, too! 


Wednesday, July 18, 2012

"Read" Upcycled Art


Supplies:

  • Newspaper
  • Scissors
  • Hot Glue
  • Cardboard (circle, for back of flower)
  • Cardboard boxes (For "Canvas)
  • Tissue paper in blue, green, and white
  • Floral pins and (optional) floral staples
  • Stapler

   I made this for an independent bookstore that I work at. I'm always working on something (or, rather, I was, but we are currently going out of business. BOO!) to brighten up the store and add a little character. Originally, I made this Newspaper Dahlia by following the steps using This Lovely Design at Vively Online for her Paper Medallion.
             It took alot of cutting, rolling, and gluing! I was initially going to make two but... this is more of an "at home" project because it was getting pretty messy. I was going to make one for each side of our TV display screen, but when I held up just the Dahlia against the wall...well, it looked almost dangerous. I'm guessing the newspaper colors against the naked wall made it look pretty sharp? Either way, I thought it needed a little more OOMPH! I decided to take two empty snapple boxes (really, any rectangular semi skinny box would do, I just had snapples on hand and they are a great shape) and I attached them together using hot glue and some floral staples that I had from a different project. I added those for reinforcement.


Lay out a double layer of blue tissue paper, and attach to the inside of the "canvas" using stapler (out of sight). Choose location for the flower, then glue generously onto the back and place on the "canvas". After this has dried, use floral pins and staples through insides of flower petals, pushing pins from the front of the canvas, through the cardboard, and bending them in the back. This should keep the tissue paper from ripping and should keep the flower attached with more stability.

Roll the green tissue paper into a "stem" shape, making sure the bottom tucks inside the back of the canvas, and the top end is hidden under the flower petals. Staple the bottom on. While the rest is still loose, cut out the leaf shape from another piece of green tissue paper and dab glue on it, beneath the stem, then again at the tip of the leaf (do not glue too much, just enough to attach it, but still have it look "leafy"). Attach the stem over the raw edge of the leaf with a bit of glue, then attach with glue under the flower petals.

For "READ": Roll up a thin piece of white tissue paper, lay out the shape of your letter, then put a thin line of glue on the back of the paper. Make the shape and, as the glue is still wet, use floral pins through the white tissue paper and all the way through the back of the cardboard. Use as many of these as you'd like, they add a bit of charm AND stability to your letters. For safety's sake, take some pliers and bend all of the floral pins to keep them from stick straight out (like this ones on this piece of art do, whoops!).

It's very lightweight, so hang wherever you need something pretty in your life. I hope this inspires you to make your own variation! If so, let me know! =) Thanks for stopping by.

Ninja Turtle Lego Batman Cake


        My friend Kaylin contacted me about 2 1/2 weeks before her boyfriend Dan's 30th birthday party, saying she REALLY wanted to surprise him and make him a fantastic cake full of his favorite things. Naturally, I was all gung-ho about making what she described as a "Lego, batman, and maybe Ninja Turtle" 30th birthday cake, but I was also a bit skeptical because...well, because Kaylin and I have known each other a LONG time and working on a cake together seemed awfully dangerous  because we really know how to push each other's buttons. Kaylin claims I have a super short temper (yes, pretty guilty) but ask anyone that knows HER and they will tell you that yes, she can really push some buttons. So, you know, there was that. Regardless, we were still both sucking it up and ready to make this surprise birthday cake!
      I baked the cakes, gave them a crumb layer, and had them waiting for decorating which was going to take place on Monday afternoon (which gave us about 6 days at that point). Monday morning, however, I woke up to a devastating message in my facebook inbox that said she would not be available to make this cake because Dan's dad had passed away. This was also the day before Dan's actual birthday. I didn't know the man, but I can assure you I was totally crushed, for both of them. Kaylin and I have both lost dear, loved members of our lives in the last few months and...quite frankly, neither of us have really gotten over it. My dad lost his best friend (which hurt me WAY more then I could have ever expected, it hurts so much to see really...ALIVE people pass on, you know?) and Kaylin's former stepfather and good friend passed away within days of my loss. I loved and cared for them both, they were both too young to go, and even though I functioned and went on about my business those losses have set so heavy on my heart since May.
        I read a book last week that said something I truly believe: "Death doesn't add to death, death multiplies" (Absolutely True Story of a Part-Time Indian). Basically, every loss seems to come flooding back to you at every funeral, so it's like you're going to every funeral at once. The thing is, though, I can't imagine how Dan felt. I cannot imagine the pain of losing my father, I cannot imagine the weight of having it so close to my birthday, and I cannot imagine handling it as well as he has.
      Kaylin was going to cancel the cake because he needed her, and there was no time for us to meet up. They decided, however, to still have the birthday party because there was no point sitting and wallowing at home, you know? That's why, on Wednesday, I began planning the cake again and I didn't get that puppy done until 2 p.m. on Saturday when I had to leave for work. All prep work got done on Friday, and I put it all together on Saturday. Miracle work! I ran out of room on the front so I put the batman logo on the back with a "gotham city" cut out skyline (to cover some ugly fondant work).

Alot of talk, so here are some pictures:
Back of the Cake, seen above
Sewer Lid: Printout of Sewer glue to Poster Board


The Ninja turtles were made of marshmallow fondant and their pupils were wilton's edible marker.
The legos were also mm fondant; I mixed the colors, rolled them out in sheets, then cut them into semi-even lines. I cut my first "lego" and used that as a template for the size of the rest. 

TO make the LEGO wall: I rolled out a white piece of fondant as the base, and used egg whites as an adhesive. Lay the legos in a color pattern, egg white-ing them to the white base. When complete, wiggle into place on the cake (I had chocolate frosting on the cake already and it attached to this. I made a smaller one on the base of the cake, adding circles of fondant to look like the tops of the legos and attached that as well. I then rolled out and placed on one big piece of (very lumpy, whoops!! Ran out of time to fix that) fondant and then took a kitchen knife, feeling the legos underneath, and "peeled back" the outer layer. Careful not to peel too far and show the cake. 

I hope this inspire you to mix and match your own favorite characters. If you like it, it should all be on one cake, dangit.

Wednesday, July 11, 2012

DIY Make A Coffee Filter Glamelia


                Have you heard about glamelias? If you're on Pinterest and have lots of engaged friends (Like I do) or many wedding interested friends, glamelias have made quite the comeback in the past few years. A real glamelia (which I have also seen labeled as a composite rose, among other names) is many, many flowers (usually roses) taken apart and then oh, so delicately pieced back together around one main flower to form a breath taking, beautiful piece of bouquet art. These were very popular in the 40's and made to resemble those pretty camellia flowers. If you want some examples of glamelias made with real flowers, there are some lovely ones pictured on  Blossom Floral Design 's website.
            A friend of mine pinned a boatload of links to these one day and I was completely intriqued. How on earth did they make something so beautiful without destroying the petals? I explored the web (at this point I wanted to make one because I love a challenge and pretty things) but after searching I realized no, using real flowers is just beyond my skill set at this point. I had many reasons:
  • I do not have much patience

  • I do not have the gentle touch of an experienced florist (or a freelance or amateur or a floral hobbyist

  • I do not have enough money to rip apart piles of flowers in the name of a "test project" 

        To all of you out there who can make one with real flowers, I envy you and tip my hat to you. For real, they are absolutely lovely. I may someday try this with gladiola because they have those big billowy petals and that seems more manageable to me. Until I get comfortable with the process, though, I'm using coffee filters. There is a seriously awesome tutorial on Natural Beauties Floral.com for the real flower, so I modified it a bit with my fake petals.

Here is how I made my "Glamelia":


  1. Step 3
    Step 4
    Gather Supplies: Coffee filters, sharp scissors, floral tape, floral wire, pliers 
  2. Make the Center Rose: Since I don't want to make two tutorials in one, I'm going to redirect you to good ol' Martha Stewart because her web page has a wonderful, easy to follow rose tutorial. This is where I originally learned to make a paper rose, but I didn't follow it exactly this time around: I only had the "wiggly" coffee filters, which are flimsier but I used them anyway because this was an experiment. I took my filters and flattened them out, and they laid pretty nicely. Also, I did not measure my petals I just sort of "winged it" because I have made coffee filter roses previously and have a pretty good idea of what I should make. Lay this aside and grab a piece of wire.
  3. Weave petals onto second wire. I put 6 petals on each piece of wire initially. I folded the end 1/4 inch to avoid losing my petals off the other side (*I changed this as I went. I decided to tightly wrap the second wire around the center for more stability*). 
  4. Securely attach the second wire to the center rose wire. Twist up a few times, then begin placing the second wire petals against the center rose. When all petals are placed, twist the remaining second wire down the center rose wire, and then secure it with floral tape. 
  5. Layer, layer, layer. I initially started out adding 6 petals then wrapping the remaining wire around the "center rose" wire...grabbing another one and starting again. As the hours past (yes, hours, not agonizing hours I was just doing other things and kept layering and layering...) I would add 6, wrap the wire around the center once, add 4-6 more to the same wire, THEN wrap that one. **I probably would have been more affective making it "wider" by attaching the wires in a big circle with the petals THEN wrapping it around the center wire. Mine ended up being very...tall...because I had to keep wrapping farther down the center wire (you know, because the middle was getting so big) so next time I'll just make the wires get bigger with it!
Glamelia progress shots
       6.  Use pliers to pin down any loose wire ends, then floral tape thoroughly from top to bottom.  At this point I also added a festive brown leather strip wrapped around it for added charm and stability.

Wire ends secured, wrap the stem with floral tape then add decor of choice

I didn't keep track of how many petals I made, filters I used, and all that jazz, but I would say there were at least 80 added on top of the center rose, probably more. 

To take away from the starch white-ness of my cheap coffee filters, I watered down some pink and white craft paint together and doused the petals with it, then added some more pink coloring to the edges of the petals. Mine looked cheesy because I wasn't being careful, but you can add some serious color to coffee filter roses that way.


      I hope to make a bigger, more spectacular one next time, but practice makes perfect! That's why I shared this tutorial, so you can ALL practice and we can all get better...together! If you have any questions, comments, or you make one of these yourself, I'd love to know. Just drop me a comment! Thank you so much for stopping by. =) 

Monday, July 9, 2012

Update Metal Lawn Furniture


When spring finally hit (okay, it seemed to completely SKIP spring and go into ridiculous, over the top dog days of summer around here) I ventured out to the deck to spruce it up and ready it for the season. I scrubbed the plastic deck railing WITH A TOOTH BRUSH and a scrubby brush (cleaning product was moot, the thing only wanted elbow grease so I obliged). I also scrubbed the bright white metal table and chairs that hang out on the deck. Then came this mess....
They look a little "wonky" in the photo, but that's just because they're such a mess. They're very sturdy chairs, they just needed a face lift. This was a pretty easy project. I went to my neighborhood Home Depot and picked out a spray paint that noted that it could be used on metal (in the past, I've spray painted metal items with NONmetal spray paint and done OK, but there's always the chance that you're going to get runny paint that won't stick, so beware).

Seen here: Rust-Olean Deep Blue Ultra Cover

I brought home my paint and prepped the chairs and table by wiping all debris off with a damp cloth(scrubbing if necessary) then letting them dry. Once they dried, I simply took them into the yard (see that pink and purple grass under those ugly chairs? That's a previous spray paint project. You may protect your grass with a drop cloth or newspaper, but I personally just mow it out later!) and gave them a through coat. There were a million crevices so be sure in YOUR project to look at: table leg/arm bends, top and bottom of bars, and other areas you wouldn't normally notice... unless they're the wrong dang color, THEN you can see it. 
See The color difference? Wonderful!


This project took almost two cans of spray paint. Not bad for fancy new chairs. To add to the effect, I bought them luxorious new cushions from Gordman's marked down for the end of the season. The cushions were a splurge at $16 each, but those chairs were so darn cute they deserved it!

So, what do you think? I hope you absolutely love it as much as I do! Be sure to leave a comment and tell me what you think, and I'll answer any of the questions you have about this project!

Friday, July 6, 2012

Update A Dated Piece of Art


I've lived in my current home for about a year now, and recently visited a local thrift shop for the first time. I'm not sure how I went so long without going to any of the nearby thrift shops, because I've always been drawn to them everywhere I go. Regardless, I'm glad I went! On my first trip out, I found two nice sheets for $2 each, a set of white canvas curtains for $1.50 that I'm going to scrap for other projects, a totally AWESOME chair that will get it's own spotlight on here when I get around to reupholstering it, and these two charming art pieces for a buck a piece:
Cute, right? My two favorite animals, I do believe! That very serious owl is super glossy and very well maintained. I'm not sure what, if anything, I would change about it (maybe add a pop of  bright color around the outer edge?). For now, though, I like it just as it came. The same could not be said for the panda shadow box. While it is hard to see in the photo, the panda is printed onto the front glass with a "shadow box" style frame behind it. I'm considering finding some neat mementos to put inside the frame, but for now some paint and paper will suffice! Here's how it happened:
Step 1: Gather Supplies 
Step 2: Remove The Card stock backing. I kept this piece (even though it was warped) and used it as a sturdy backer for my new background paper.
 
Step 3: Paint the Frame color of choice

Step 4: Secure the new background paper with tape and add embellishments if desired (I made some little paper bamboo strips! I taped those too!)
Step 5: (This part takes a little patience to get it done right) Simply pop the newly decorated background  into the back of the frame. Stand back and enjoy!

A frame like this is PERFECT to get your hands on. You can change the background to match your decor, add little trinkets to keep them on display, and it doesn't take long to change the frame color with a little craft paint. I hope this inspires you to take on your own little craft projects. Thanks for stopping by!


Tuesday, June 26, 2012

Carnival Birthday Sign

I thought I'd take a moment to share a Carnival sign I made for my nieces joint 1st and 3rd birthday. We are BIG on using what's on hand (my mom, brother, AND sister in law are probably the best team  ever to work with on crafty projects... for real, so many ideas between all of us!) and not big on spending money on things we can make. Here, I used an empty bookshelf box, gave it two white coats of acrylic paint, some haphazardly painted red stripes, then printed "CARNIVAL" using the FREE Circus font by Dan Roseman (I love that guy for creating this perfect font) in 400 pt font. I cut out the letters, lined them up, used Elmer's glue to attach them, then touched up my running out ink with some black acrylic paint. I then added the girls names (the best nieces ever) to personalize it, and added a simple black outline to give it a finished look. I glued the sides back together and we just used it as a standing on the ground sign instead of making it a hanging one. Did I mention we also got way into balloon animals, I paint faces, and my sister in law made this cute balloon entrance stand? We party hard. I would have painted ALL the sides of the box, but I bit off more then I could chew and ran out of time, but I promise we all survived and loved it =) .
I used yet another one of these boxes (hey, I got two shelves and I'm a sucker for leftover cardboard) and some leftover Easter eggs for a TICKETS sign:
I tried to rotate this a MILLION times...
I used the round end of all of my Easter Eggs from two discount packs, spray painted them all a silvery pewter color I had laying around, and hot glued them on. I used blue paint on my letter print outs here (I ran out of black ink and ran with it). 

                                         I hope this inspires you to create something great!

Monday, June 25, 2012

""Nightmare Before Christmas" Wedding Cake

Today I'd like to share a "Nightmare Before Christmas" wedding cake a friend of mine asked me to make for her...for her Father's Day wedding. Originally, the wedding had been planned for October so she had dreamed of having a Jack and Sally cake topper. When they decided to bump it up to June (she won a free trip to Florida! They decided to use that opportunity to make it their honeymoon and decided to give everyone a week's notice that they were doing a small, casual wedding instead of the larger one they had been considering) I was given one week to whip them up a cake. I think I did pretty well, time alotted!


Secure tape down before wrapping

Foam Packaging cake stand, shown here with un-iced cake

 The bottom was a basic sheet cake with butter cream frosting (a 13x9 pan) using this delicious and very dense (which is GOOD for these stacking cakes!) Dense White Wedding Cake Recipe . The only change I made (as suggested by user submissions) was adding some almond flavor on top of the vanilla, which gave it that good ol' "wedding cake" taste. Mmm.  I was out of parchment so I sprayed the pan with an ample amount of food release and powdered thoroughly with flour (which is why the cake appears discolored without the icing, above). When the cake cooled, I gave it a good "hand brushing" and removed most of the heavy flour-ing (not like you can tell with icing on it! I just wanted a good taste all around haha). That beautiful "present" being used as a cake stand is actually a foam packaging unit that came with my computer. Pretty wrapping paper ($1 at Target) and some **Shelf Liner** which is infinitely useful in keeping big pretty cakes in place made this foam packaging a wonderful, lightweight, and sturdy cake stand...best of all it was free! Waste not, want not =)

 Because I was not sure when I began baking just HOW I planned on making this topsy turvy tower, I baked two 6 inch round cakes and another, thinner 13x9 rectangle cake. I finally found a wonderful tutorial for making those neat topsy turvy (aka "Mad Hatter") cakes at My Sweet and Saucy . I particularly liked this one because I prefer a photo and text tut over a video when the subject is something I do not need to see happening (like when I learned to smooth fondant, THAT was a video day!). She also has a beautiful website and her tutorial is very well written! I realized I should have made more round cakes, but I was out of eggs and time. Instead, I hacked the second rectangle cake into circles and arches using the 6 inch pan as a guide.
Use "tower" pan, cut out corner
The "Final" bottom product
"Dry Stacking" (Not Technical term)
I cut out one corner (again, using the 6 inch pan as a guide) because I wanted the "tower" to appear as part of the cake without taking up much surface space .I think we can all imagine it's easier to serve a sheet cake then it is to serve a tower! =) . I cut circles and arches from the "extra" sheet cake, then stacked them all different ways to see how they would sit best. I ended up icing the bottom two together, then icing THAT thoroughly with the blue until it appeared it was part of the cake. I then cut and put in a handful of wooden dowels to support the weight of the tower. I wrote their names with butter cream (a bit runnier then usual for easy writing) in a free hand heart made to look "stitched". I have no idea how I made this all so straight, pure luck I promise. I made the needle out of marshmallow fondant (Have you tried making Marshmallow Fondant ? Here is a very insightful tutorial with all sorts of tips! I don't use flavor, usually I just pop the ol' marshmallows, fondant, and crisco for greasing into a pile, but I imagine you'd have much greater results the recipe's way!).

A Breakdown of The Final Tower
I cut a cardboard circle just a little smaller then the 6 inch cake pan (this pan was a life saver! How many times did I measure with this thing?), placed that on a lazy Susan on another piece of shelf liner, covered the cardboard in aluminum for good measure, then placed one 6 inch cake on that. I cut the second 6 inch cake on an angle as the tutorial instructed, iced part of it on the bottom layer, and then iced the whole thing lightly (I don't remember where I learned this, but icing a cake with a thin layer and letting it cool or set overnight will greatly reduce the cake crumbs on your finished icing layer, I use the same method before I'm putting on fondant). At this point, I didn't HAVE another cake for the second layer of the tower! Instead of freaking out, I simply took the triangle I cut from the bottom layer and took a few other solid pieces together and iced them to form a smaller, not as curvy layer (this is why my swirly layer appears "smushed"). She just wanted the bottom to be tasty and the top to be pretty =) but it turned out tasty too I promise, it just didn't make such a pretty cut! It was terribly late and I was very tired, so I unfortunately did not take pictures during this smooshing process. I tinted my marshmallow fondant to almost match the cake (with some set aside for grey and some leftover still white), rolled it out, and covered the bottom layer (the second layer was off to the side at this point). When the fondant was as smooth as I could get it, I cut it, then put three wooden dowels in that stuck out about 4 inches above the top of the bottom layer. I cut the stripes from rolled grey fondant with a kitchen knife (no, they weren't perfect, it's part of the charm!) and GENTLY wet them before attaching them to the cake.I stretched them long enough so all of the ends would be hidden by the second layer of cake and the bottom piping frosting.  I put fondant on the second level and set that straight on the wooden dowels. About 2 inches of wooden dowel were still sticking out, and instead of ripping them out of the cake to cut them, I used clean foam (attached with icing, covered with fondant for appearance and to keep chemicals off the cake) and made a stand for the topper because it was heavy and I felt uncomfortable setting it directly on the cake (Did I mention it was like 90 degrees at this outdoor wedding? I was NOT watching my polymer clay Jack and Sally fall off a melted cake). I used a large, round wilton tip and piped out a loose edge around the cake (I wanted it to have an ample amount of icing but I did not want to put in great detail since I knew this would melt a bit at the ceremony, and I was right about that!). I added the curly cues with the writing icing from the bottom layer, and I piped the light grey icing around each "layer" of the tower for a cleaner look.

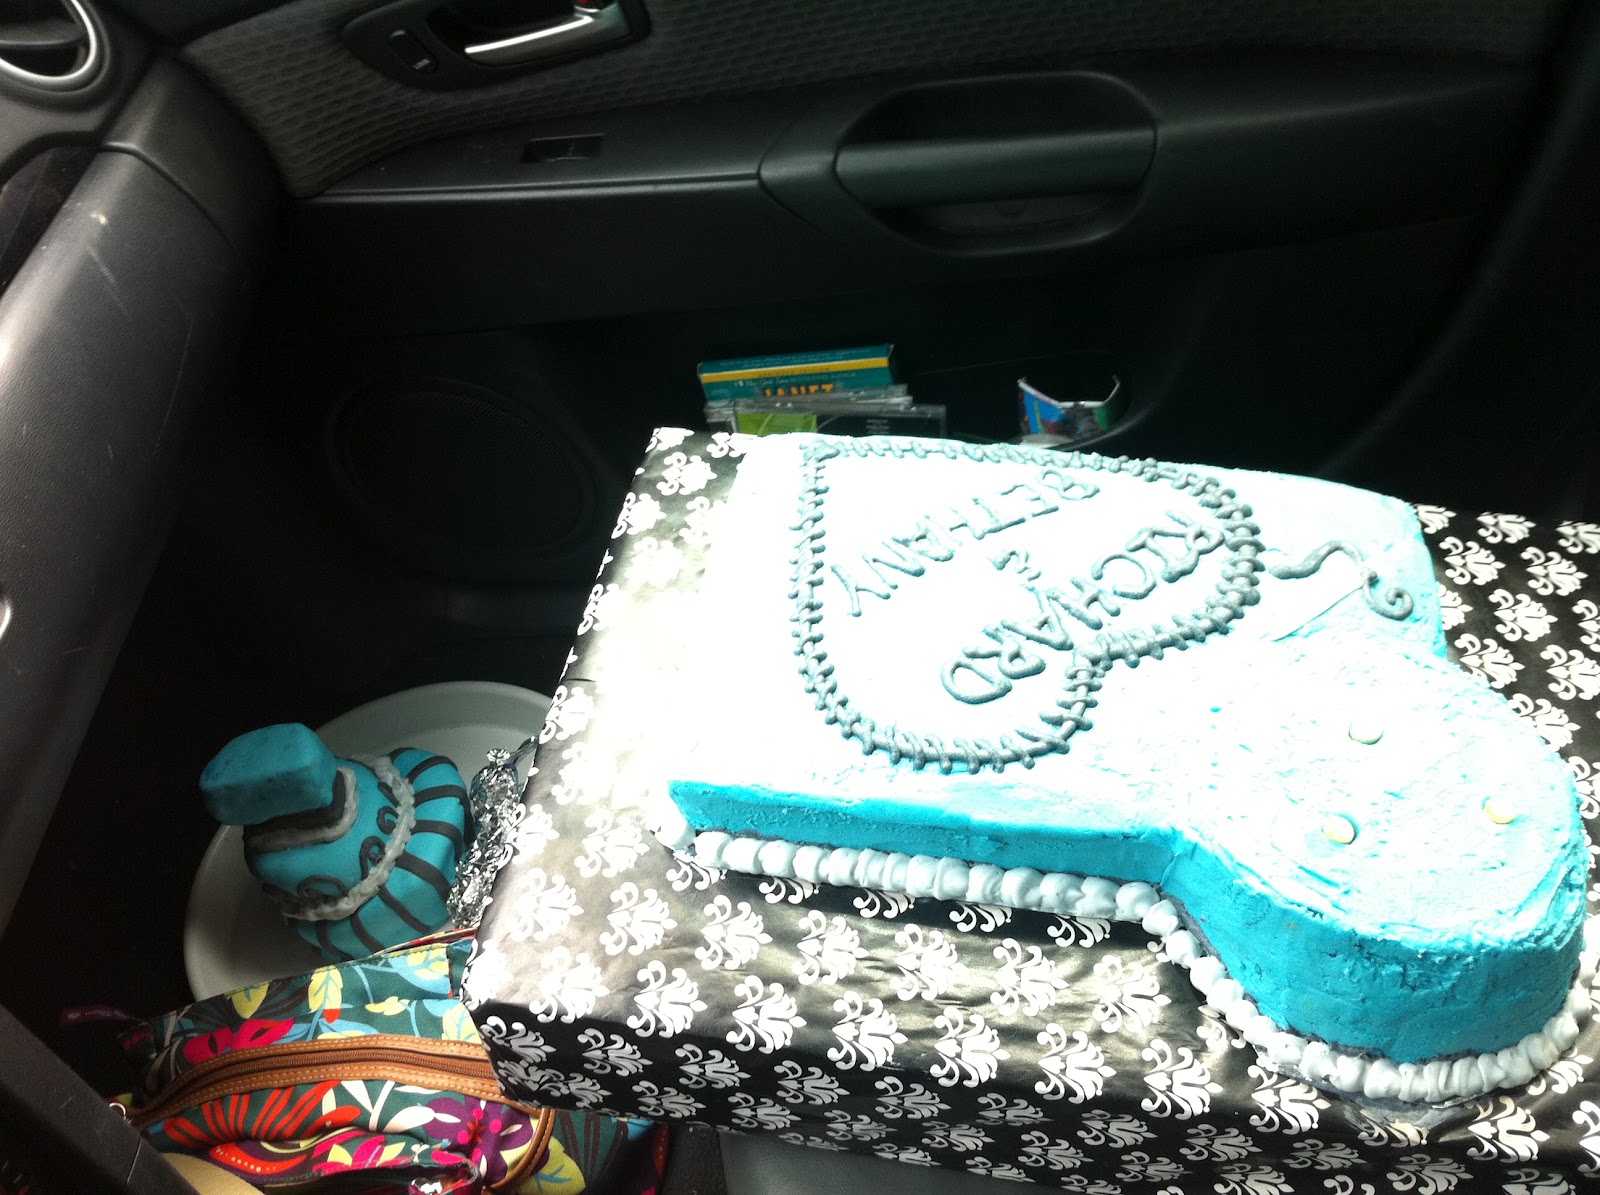
Transporting the cake 40 minI cut the stripes from rolled grey fondant with a kitchen knife (no, they weren't perfect, it's part of the charm!) and GENTLY wet them before attaching them to the cake.utes away on winding roads was TERRIFYING. I kept the large cake on my front seat and, because I couldn't bare the thought of not being able to see all of it, I set the tower on the lazy Susan in the floorboard on a towel. Jack and Sally traveled, wrapped in foil loosely, on the SIDE of the lazy Susan (not on the cake). I attached a picture of the set up. Everything arrived smoothly (thanks, shelf liner!). When I got there, I placed the tower onto the circular platform on the sheet cake and piped around the bottom edge of the tower (I brought the piping bag of EACH icing in a cake pan, just in case). I put some icing on the top before putting Jack and Sally on the tower, for safety's sake. I also added a "Nightmare Before Christmas" quote on the *cough cough* cake stand to tie them together and add a little more whimsy to the cake.

If you have any questions or comments, please let me know! I hope this helps you make your own semi-fancy cake at home. 

Monday, April 16, 2012

Cheap, Quick, and Easy Angry Birds Pinata DIY

        The day before my brother's birthday party, I discovered he had asked for an Angry Birds pinata but he had been politely told that mom and dad couldn't find one in the stores and maybe he could have one next year. Me, being the crafty (but more importantly, DEFIANT) little critter that I am, said "Yeah, you get the candy and I'll make the pinata happen"...not really knowing what my plan was.
      I read online about many home made pinatas from brown paper bags, and my older brother made one from a gift bag for my niece's birthday....but I wanted something round.You know, I wanted to smash the bad guy, a pig! I would have made paper mache, but I didn't have the time(which seems to be my life story haha). I found my solution at work, and they even gave it to me for free from the window display: A Green paper lantern. They were originally from Hobby Lobby in a 3 pack of lime green lanterns costing $5.99-7.99. I used the big one as the pinata, and the small one as a decorative "play" pig (which I never got a picture of finished, but I just added a paper face!).
Because they have a waxy/wire body, I figured it would be pretty sturdy overall, but the paper is so delicate I reinforced it by gluing it sheets of newspaper to the inside (including 3 in the bottom where the hole was). It became very sturdy very fast! I didn't even use the metal wire support in the middle.
To give it a "Pinata" look, I bought a roll of Crepe Paper Streamers ($0.97), cut the crepe paper about 3/4th of the way through and then ran a strip of glue along the part I didn't cut, attaching it to the lantern.
I made the eyes and nose out of printer card stock and outlined them with sharpie, attaching them with tape.

*****A Tip to Anyone making this: REINFORCE THE TOP 5 inches or so with packaging or duct tape, ours kept it's shape for many beatings but it felt down on the first hit! I think we also had too much candy in it weighing it down. More layers of newspaper (think inner "paper mache") would help as well. I did NOT use the wire that supports the middle as I said, I thought it might be dangerous for hitting. The newspaper was enough reinforcement to keep it circular. The very thin waxy wire that circles the lantern from top to bottom didn't pop out or break at all, it was like this neat piece of dental floss that helped rip the pinata apart =) .
 
Blogging tips