Today I'd like to share a "Nightmare Before Christmas" wedding cake a friend of mine asked me to make for her...for her Father's Day wedding. Originally, the wedding had been planned for October so she had dreamed of having a Jack and Sally cake topper. When they decided to bump it up to June (she won a free trip to Florida! They decided to use that opportunity to make it their honeymoon and decided to give everyone a week's notice that they were doing a small, casual wedding instead of the larger one they had been considering) I was given one week to whip them up a cake. I think I did pretty well, time alotted!
 |
| Secure tape down before wrapping |
 |
| Foam Packaging cake stand, shown here with un-iced cake |
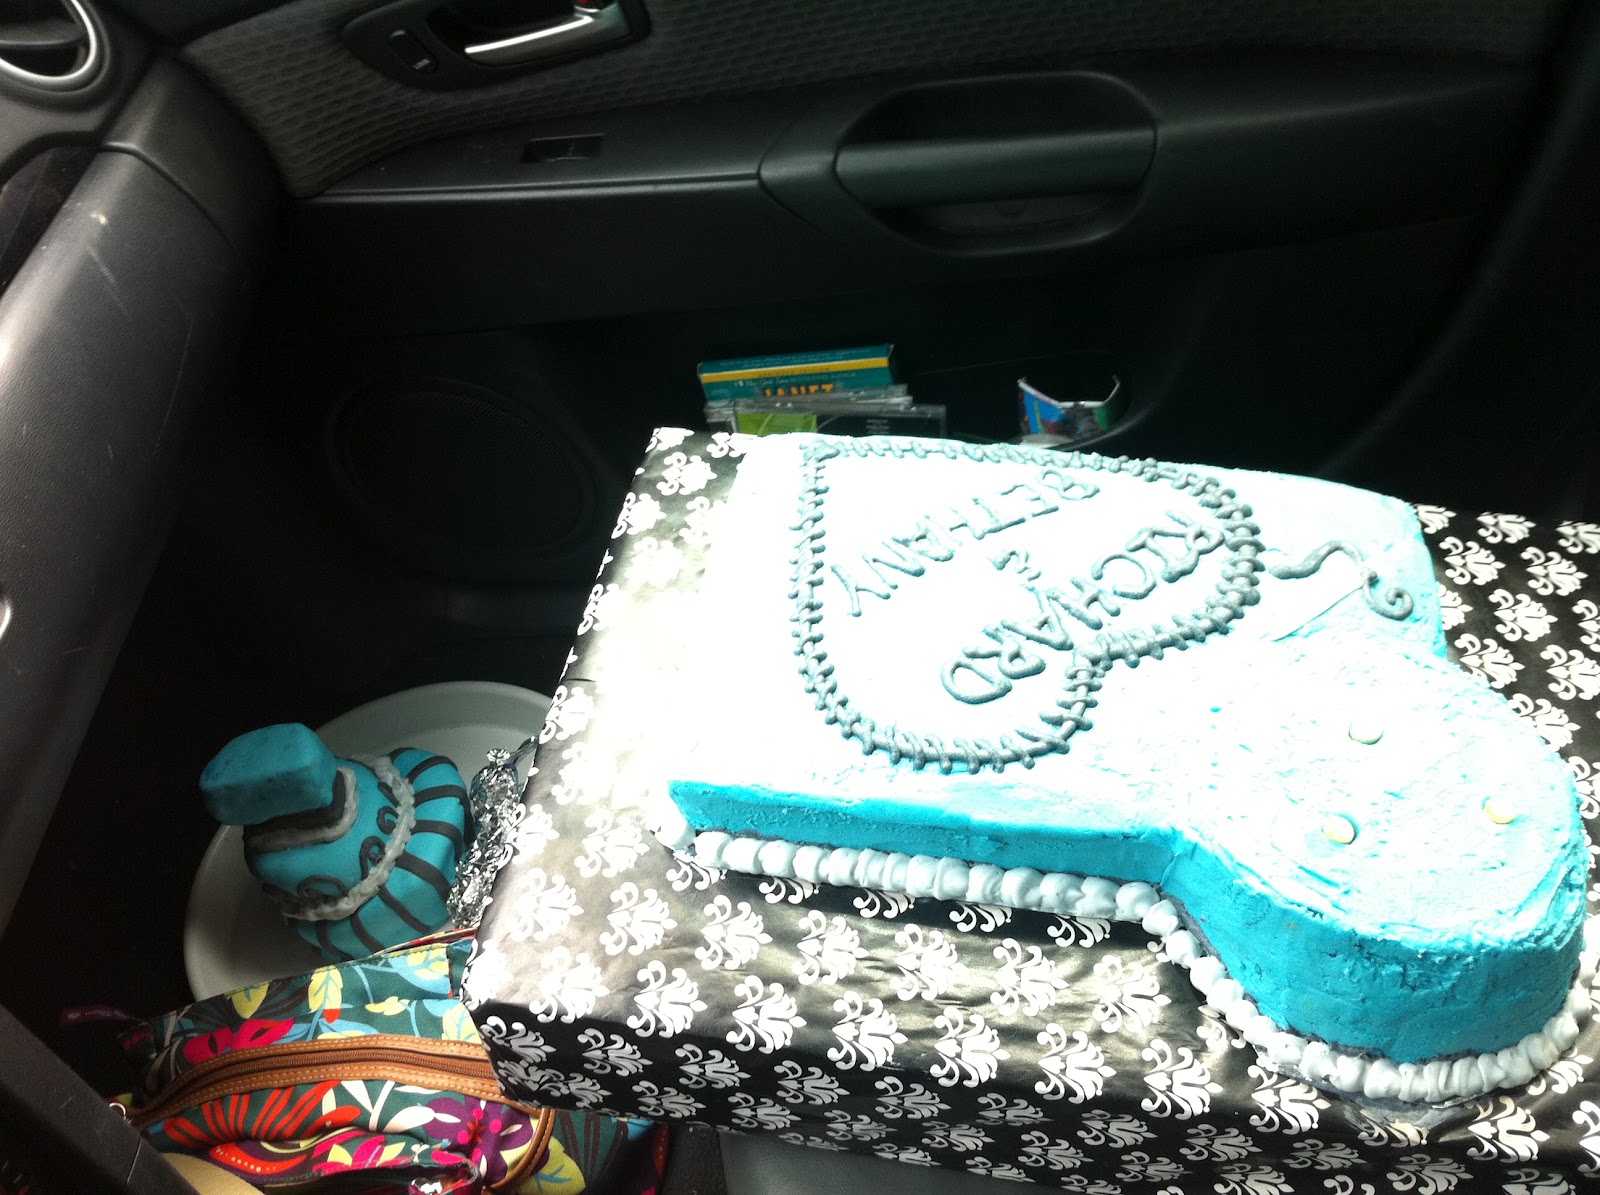
The bottom was a basic sheet cake with butter cream frosting (a 13x9 pan) using this delicious and very dense (which is GOOD for these stacking cakes!)
Dense White Wedding Cake Recipe . The only change I made (as suggested by user submissions) was adding some almond flavor on top of the vanilla, which gave it that good ol' "wedding cake" taste. Mmm. I was out of parchment so I sprayed the pan with an ample amount of food release and powdered thoroughly with flour (which is why the cake appears discolored without the icing, above). When the cake cooled, I gave it a good "hand brushing" and removed most of the heavy flour-ing (not like you can tell with icing on it! I just wanted a good taste all around haha). That beautiful "present" being used as a cake stand is actually a foam packaging unit that came with my computer. Pretty wrapping paper ($1 at Target) and some **Shelf Liner** which is infinitely useful in keeping big pretty cakes in place made this foam packaging a wonderful, lightweight, and sturdy cake stand...best of all it was free! Waste not, want not =)

Because I was not sure when I began baking just HOW I planned on making this topsy turvy tower, I baked two 6 inch round cakes and another, thinner 13x9 rectangle cake. I finally found a wonderful tutorial for making those neat topsy turvy (aka "Mad Hatter") cakes at
My Sweet and Saucy . I particularly liked this one because I prefer a photo and text tut over a video when the subject is something I do not need to see happening (like when I learned to smooth fondant, THAT was a video day!). She also has a beautiful website and her tutorial is very well written! I realized I should have made more round cakes, but I was out of eggs and time. Instead, I hacked the second rectangle cake into circles and arches using the 6 inch pan as a guide.
 |
| Use "tower" pan, cut out corner |
 |
| The "Final" bottom product |
 |
| "Dry Stacking" (Not Technical term) |
I cut out one corner (again, using the 6 inch pan as a guide) because I wanted the "tower" to appear as part of the cake without taking up much surface space .I think we can all imagine it's easier to serve a sheet cake then it is to serve a tower! =) . I cut circles and arches from the "extra" sheet cake, then stacked them all different ways to see how they would sit best. I ended up icing the bottom two together, then icing THAT thoroughly with the blue until it appeared it was part of the cake. I then cut and put in a handful of wooden dowels to support the weight of the tower. I wrote their names with butter cream (a bit runnier then usual for easy writing) in a free hand heart made to look "stitched". I have no idea how I made this all so straight, pure luck I promise. I made the needle out of marshmallow fondant (Have you tried making
Marshmallow Fondant ? Here is a very insightful tutorial with all sorts of tips! I don't use flavor, usually I just pop the ol' marshmallows, fondant, and crisco for greasing into a pile, but I imagine you'd have much greater results the recipe's way!).
 |
| A Breakdown of The Final Tower |
I cut a cardboard circle just a little smaller then the 6 inch cake pan (this pan was a life saver! How many times did I measure with this thing?), placed that on a lazy Susan on another piece of shelf liner, covered the cardboard in aluminum for good measure, then placed one 6 inch cake on that. I cut the second 6 inch cake on an angle as the tutorial instructed, iced part of it on the bottom layer, and then iced the whole thing lightly (I don't remember where I learned this, but icing a cake with a thin layer and letting it cool or set overnight will greatly reduce the cake crumbs on your finished icing layer, I use the same method before I'm putting on fondant). At this point, I didn't HAVE another cake for the second layer of the tower! Instead of freaking out, I simply took the triangle I cut from the bottom layer and took a few other solid pieces together and iced them to form a smaller, not as curvy layer (this is why my swirly layer appears "smushed"). She just wanted the bottom to be tasty and the top to be pretty =) but it turned out tasty too I promise, it just didn't make such a pretty cut! It was terribly late and I was very tired, so I unfortunately did not take pictures during this smooshing process. I tinted my marshmallow fondant to almost match the cake (with some set aside for grey and some leftover still white), rolled it out, and covered the bottom layer (the second layer was off to the side at this point). When the fondant was as smooth as I could get it, I cut it, then put three wooden dowels in that stuck out about 4 inches above the top of the bottom layer. I cut the stripes from rolled grey fondant with a kitchen knife (no, they weren't perfect, it's part of the charm!) and GENTLY wet them before attaching them to the cake.I stretched them long enough so all of the ends would be hidden by the second layer of cake and the bottom piping frosting. I put fondant on the second level and set that straight on the wooden dowels. About 2 inches of wooden dowel were still sticking out, and instead of ripping them out of the cake to cut them, I used clean foam (attached with icing, covered with fondant for appearance and to keep chemicals off the cake) and made a stand for the topper because it was heavy and I felt uncomfortable setting it directly on the cake (Did I mention it was like 90 degrees at this outdoor wedding? I was NOT watching my polymer clay Jack and Sally fall off a melted cake). I used a large, round wilton tip and piped out a loose edge around the cake (I wanted it to have an ample amount of icing but I did not want to put in great detail since I knew this would melt a bit at the ceremony, and I was right about that!). I added the curly cues with the writing icing from the bottom layer, and I piped the light grey icing around each "layer" of the tower for a cleaner look.

Transporting the cake 40 minI cut the stripes from rolled grey fondant with a kitchen knife (no, they weren't perfect, it's part of the charm!) and GENTLY wet them before attaching them to the cake.utes away on winding roads was TERRIFYING. I kept the large cake on my front seat and, because I couldn't bare the thought of not being able to see all of it, I set the tower on the lazy Susan in the floorboard on a towel. Jack and Sally traveled, wrapped in foil loosely, on the SIDE of the lazy Susan (not on the cake). I attached a picture of the set up. Everything arrived smoothly (thanks, shelf liner!). When I got there, I placed the tower onto the circular platform on the sheet cake and piped around the bottom edge of the tower (I brought the piping bag of EACH icing in a cake pan, just in case). I put some icing on the top before putting Jack and Sally on the tower, for safety's sake. I also added a "Nightmare Before Christmas" quote on the *cough cough* cake stand to tie them together and add a little more whimsy to the cake.
If you have any questions or comments, please let me know! I hope this helps you make your own semi-fancy cake at home.


.JPG)